Over the last couple of months I've been working on my line course, and have finally finished. first of all we had to do some research on a line designer, and a brief outline on the relevance of line in design. then we did our drawing.
 My design idea came originally from a gum leaf, I choose it because of it's slim line and texture.
This first photo (above shows this in a sepia colour)
From here we were then to add more depth to our line drawing.
So using different pencils ranging from HB to 6B, I drew them.
The next exercise asked us to use the 'L' frame method, and wingle it around our drawing to single out a section to enhance with more lines and doodling. First photo is using the 'L' frame.
Second photo is adding more detail to my leaves.And the third part of the second exercise was to add doodling to the line drawings.
Colour was next.... this photo shows the colouring using brown charcoal and acrylic paint. i also used crayons and felt pens.
Exercise 4 involved drawing texture, this was done on 5 piece's of paper, one using a fine tip pen, i also used chalk, acrylic paint, crayons and charcoal. this photo shows the fine tip pen, which I used for exercise 6.
Exercise 5 was to go back to our exercise 2 drawings and add more texture using some of the pen strokes used in the grid above.
This turned out quiet good I thought.
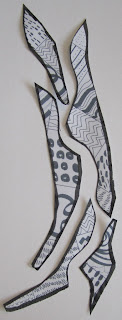
Now the next two exercises were a bit more challenging. Exercise 6 we took our exercise 1 line drawing and laid it over the top of our exercise 5 texture grid and drew a few shapes, as you can see in the photo below.
We were then directed to cut them out and cut into smaller pieces and place them around and make some different designs. This is one of the first ones I came up with, does it look like a boot to you. Well it did for me and so .........
So thinking this was what I had to make my final design on, I stitched it, but not so...... That was suppose to come from exercise 7, anyway I have a nice piece now......
Exercise 7 we were direct to using another design from exercise 2, we were directed to enlarge our picture and cut into 1 inch strips. Number the strips as we cut them and lay on a piece of paper and slide the strips up and down to get an entirely different design.
Add more lines and then add colour. Using whatever was on hand.
I used satin ribbon, silk, feathers, wool, paper and felt tip pens.
Now the next was to do our embroidery samples, there were 5 to do, linear stitches, textured stitches, patterned stitches, isolated stitches and the final piece. Here is my sampler for the stitch groups.
And my final design from Exercise 7, stitched.
I learnt a lot from doing this course and hope to do more, just got to convince hubby it's worth the money......
TTFN
Arlene


8 comments:
Awesome Arlene! It looks like a lot of fun and it is amazing what you can do with it.
Looks like the class was lots of fun. Love what you done with it Arlene!
I found the exercises to be outstanding. Your results are truly awesome and it is hard to believe it all started with one gum leaf. Who ever the teacher was that wrote this course knows a lot about creating design. Thanks for sharing. I was so caught up in what I was seeing I began to wonder what would happen if we used the Colorado Aspen Leaf, lol.
It was alot of hard work, really had to get those brain juices working.
Arlene
Hey Arlene! Just popped in to say thanks for your thoughts to us in the wake of the flooding here in Toowoomba. We're still high and dry, though raining again now. Hope your loved ones are safe and well and contactable soon. Bear Hugs! KRIS
That's a fascinating exploration - it looks as though you must have learned a lot from it!
This class looks as if it was a fascinating experience for you. I loved scrolling through the drawings, colourings and finally the stitching. I can see why you want to do more!!!!
Thank you for sharing this and taking the time to document it so well! Great!
Post a Comment